Using your own photos in your book
 Though all photos may look the same to you, how they can be used depends on many factors, including what size they are. For example, you may have a photo taken on your phone, which you would like to enlarge and use as a feature photo. However, the quality may not be good enough for it to be enlarged to the correct size. When using your own photos, it is important to consider the dimensions of your photos (measured in pixels) and the file size (measured in KB and MB). The larger the dimensions, the larger the file size and the greater the quality. Having the best quality photos means that you have more choices about how you can use the images you’ve collected in your book.
File formats
Digital photos are often stored in the Joint Photographic Expert Group (JPEG) file format. This format is highly compatible and therefore suitable for simple printing and placement within ebooks, however, it does not support transparency. You can complete basic edits with JPEGs such as crops and colour changes. Digital photos can also be stored as Portable Network Graphics (PNG) and Tagged-Image File Format (TIFF). The PNG format preserves the image so that it can be transferred digitally and supports transparency. It is not designed for print and is not as compatible as JPEG files. TIFF files are versatile and are used to save high-quality images, as well as supporting transparency. The format is widely used in graphics programs such as Adobe Photoshop and is suitable for print images.
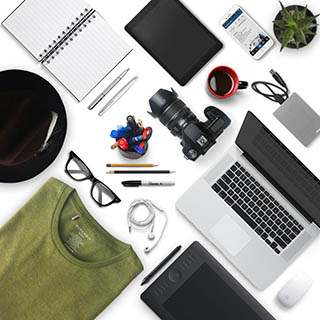
Creating photos for your book
If you are just starting out on your book publishing venture and you intend to include photographs taken by you, pay attention to the following factors:
- Using a good quality camera
- Taking photos in optimal lighting
- Getting permission
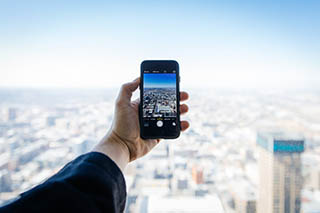
Using a good quality camera
A digital SLR is a good start towards obtaining a camera that will have some chance of creating good quality images for use in a printed book. For ebooks, the quality you need will probably be achievable using any digital camera or even a mobile phone camera. If in doubt, take a few photos, show them to a graphic designer or to PublishMyBook.Online, along with an outline of how you intend to use them (what size and in what layout in print or ebook or both) to get some advice.
Taking photos in optimal lighting
If you don’t pay attention to your surroundings when taking photos, you will often notice unsightly shadows later. When viewing images on a larger screen than your camera or mobile phone, harsh shadows from bright sunlight, shadows over faces from objects behind you and other problems will be more noticeable. If you are going to take your own photos you may need to do a course in digital photography, such as one on Lynda.com. There is an art to photography, and lighting is just the beginning of this skillset.
Getting permission
Most people don’t know that when a photographer is on private property, he or she must get permission from the proprietor before taking photos there. Otherwise, they can be accused of trespassing. In most locations very few proprietors enforce this right, and very few photographers bother to get permission. You might find yourself in hot water, however, if your photo can be used as evidence that you were trespassing. If you’re concerned about this, check the laws that relate to trespassing and photography in your country.
Taking photos of people might require permission too. If the person in question has any fame, you might need their permission to use an image of them. Otherwise your use of the image may imply endorsement they did not intend. Many countries also have rules about photographing children who are under state protection, so check your local country’s laws for details. If you can get permission from people to photograph them for use in your book, do so. Getting this in writing is even better than a verbal or assumed assent. People were posing for your photo—this implies permission to take the photo right?
How to organize the images for your book
Save your images in a folder for the project using the following kind of structure:
- Images\Photos\Originals-from-camera\
- Images\Photos\Adjusted\
- Images\Photos\web-quality\
Those in the adjusted folder might have been cropped, had red-eye or other errors removed, colours balanced, unwanted objects removed, blemishes photoshopped, etc. They might also be changed over to 300dpi ready for use in your printed book or cover design. The images in the web-quality folder will be saved at 72dpi and at a small size (eg. 500 pixels wide) ready for use in social media or on a website.
Once the layout of your book commences, the designer will receive a copy of the adjusted images, and should save these in a folder called ‘links’ in with the rest of the layout files. Most graphic designers will further adjust images before sending them to print, as it is part of their job to do so. If you’re not sure what your designer will do, please check your quote or agreement with them, or ask them.
Working with printed photos (hard copy)
If you plan to use your own photos that predate the digital era, it is best to work with a graphic designer. They can scan your photos and edit them as required so they are suitable for use in your book.
A graphic designer can also work with you on your digital images so they are of the highest standard for your book. They are experts in digital editing and will ensure your pictures look professional and attractive your target market. Contact us today to learn more.
You may also be interested in
- View our book cover designs and prices
- Produce a better book
- Why use a self-publishing service instead of going it alone?
- Fair dealing and fair use of copyrighted images
- Finding public domain or free royalty-free images
- Using your own photos in your book
- Working with illustrators for your book